> For the complete documentation index, see [llms.txt](https://docs.speedystaking.io/llms.txt). Markdown versions of documentation pages are available by appending `.md` to page URLs; this page is available as [Markdown](https://docs.speedystaking.io/nl/casper-netwerk/metamask/metamask-volledige-guide.md).
# MetaMask - Volledige Guide
## **Hoofdstuk 1 – Setup MetaMask voor gebruik met Casper**
**Stap 1:** Installeer en maak je MetaMask wallet aan als je dat nog niet hebt gedaan: [**KLIK HIER**](https://metamask.io/download/)
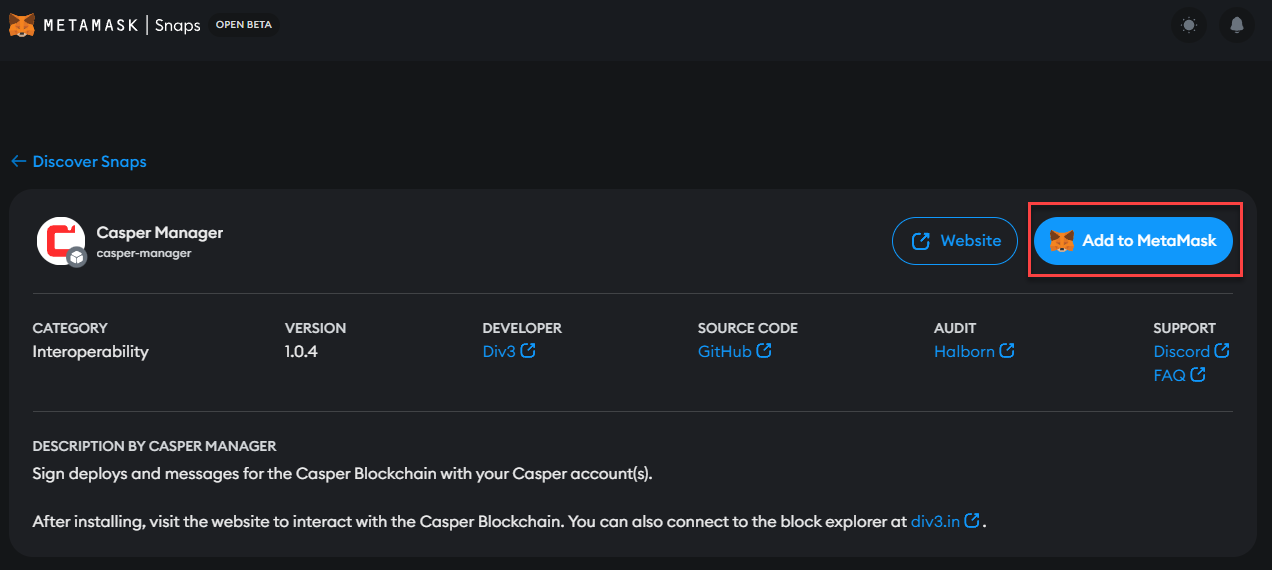
**Stap 2:** Installer de Casper MetaMask Snap door op '**Add to MetaMask**' te klikken: [**KLIK HIER**](https://snaps.metamask.io/snap/npm/casper-manager/)
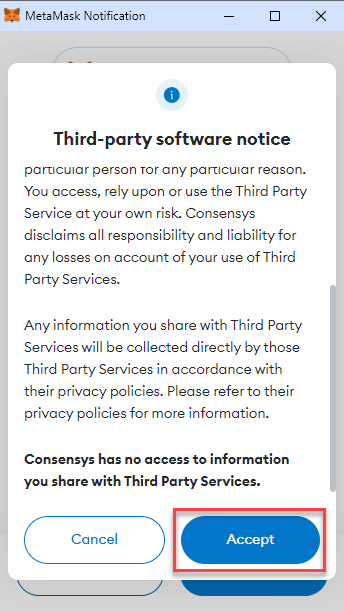
**Stap 3:** Klik op '**Accept**' in de MetaMask extensie popup.
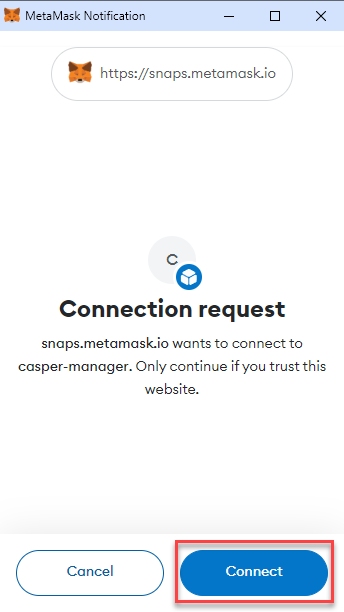
**Stap 4:** Klik op '**Connect**'.
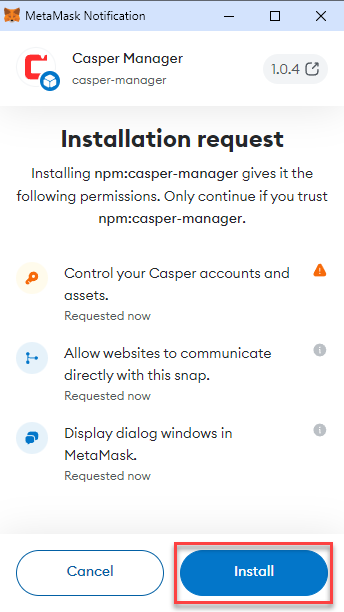
**Stap 5:** Klik op '**Install'**.
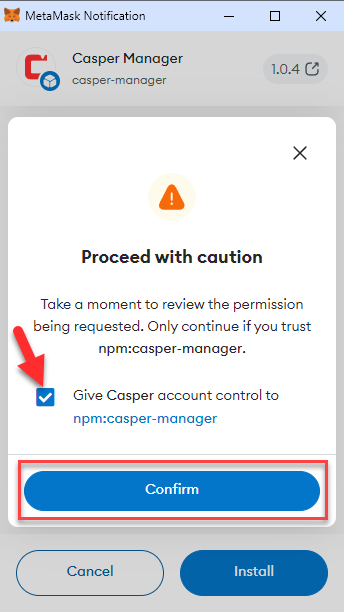
**Stap 6:** Zet het vinkje en klik op '**Confirm**'.
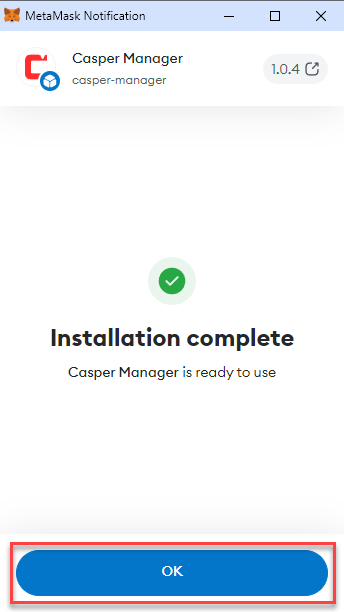
**Stap 7:** Klik op '**OK**' nadat de installatie voltooid is.
## **Hoofdstuk 2 – Verbind MetaMask met CSPR.Live**
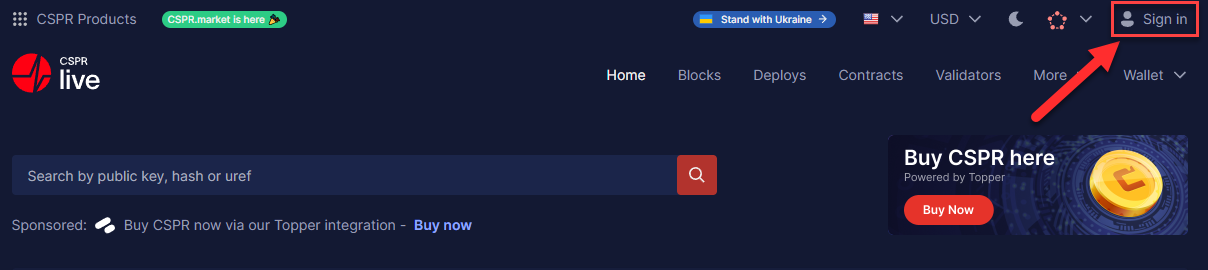
**Stap 1:** Ga naar [CSPR.live](https://cspr.live/) en klik op '**Sign in**' aan de rechterbovenkant van het scherm.
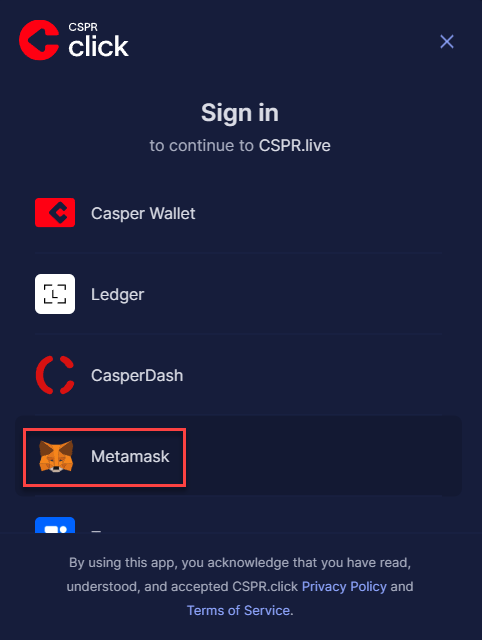
**Stap 2:** Klik op '**Metamask**'.
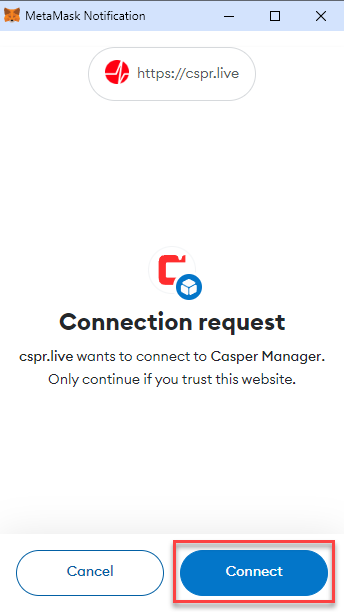
**Stap 3:** Klik op '**Connect**' in de MetaMask extensie popup.
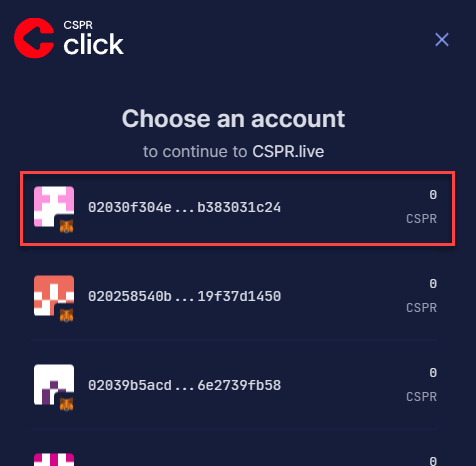
**Stap 4:** Selecteer 1 van de addressen die CSPR.live je laat zien; je kunt het eerste adres gebruiken.
## **Hoofdstuk 3 – Ontvang $CSPR in je MetaMask wallet**
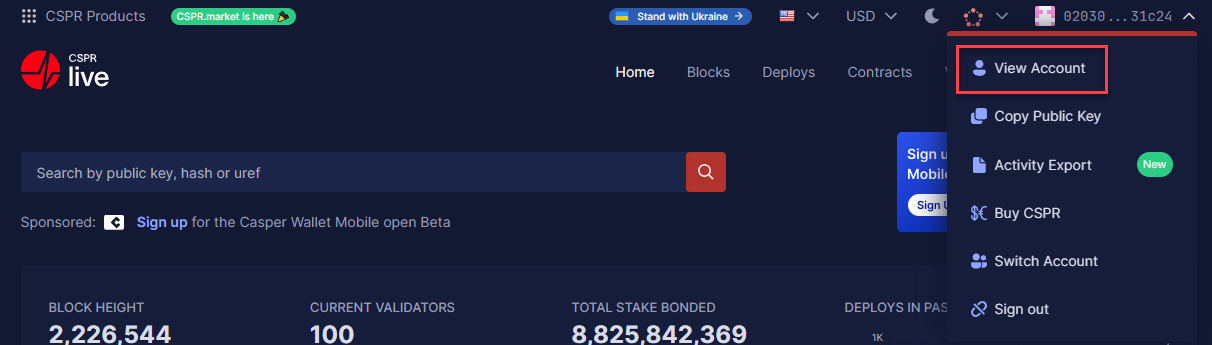
**Stap 1:** Beweeg je muis over je public key aan de rechterbovenkant van je scherm en klik op '**View Account**'.
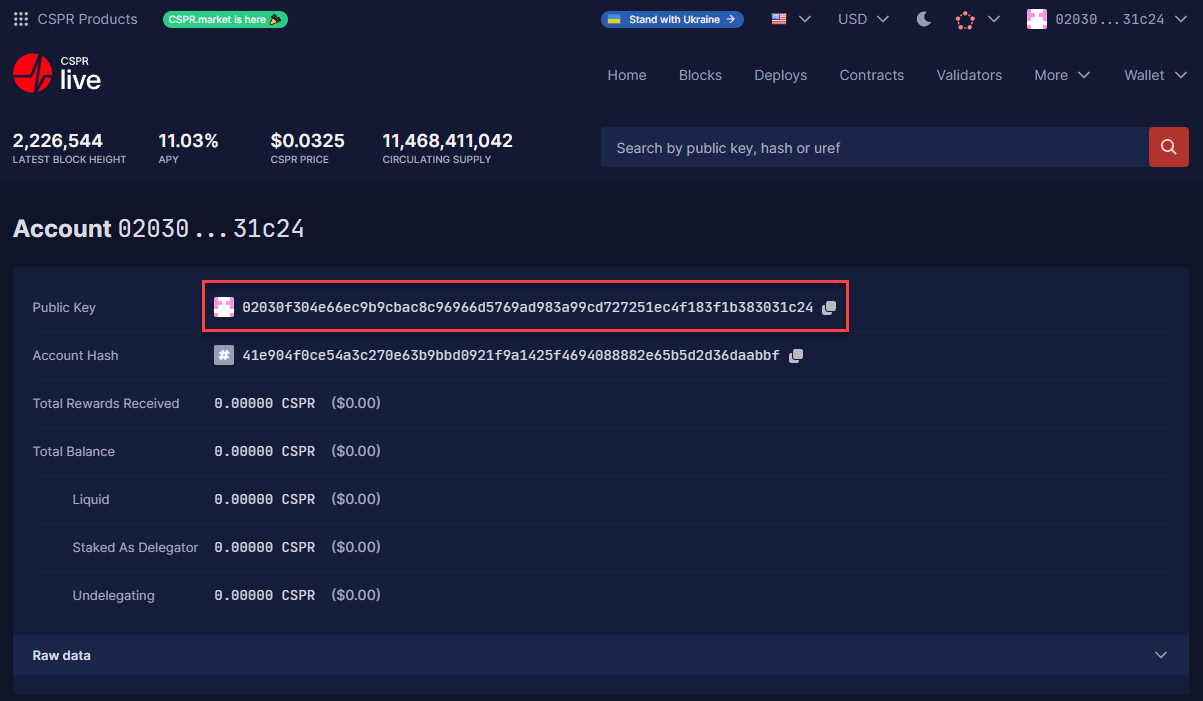
**Stap 2:** Je ziet nu je Public Key (ook wel wallet address genoemd) bovenaan staan. Dit is het adres waar je $CSPR naar toestuurt.
## **Hoofdstuk 4 – Verstuur $CSPR met MetaMask en CSPR.Live**
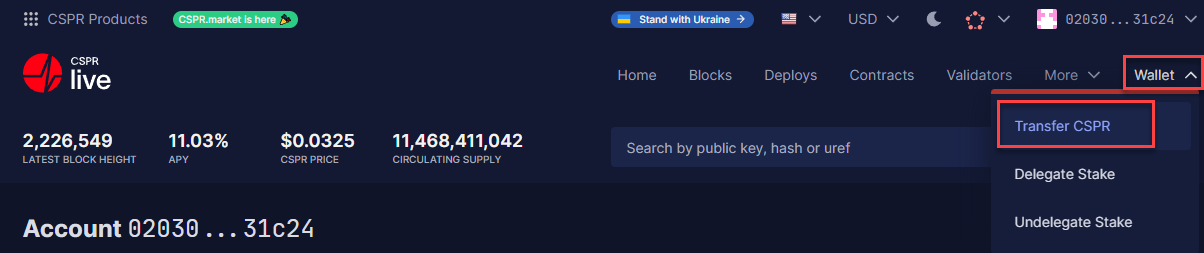
**Stap 1:** Beweeg je muis over '**Wallet**' aan de rechterbovenkant van je scherm en klik op '**Transfer CSPR**'.
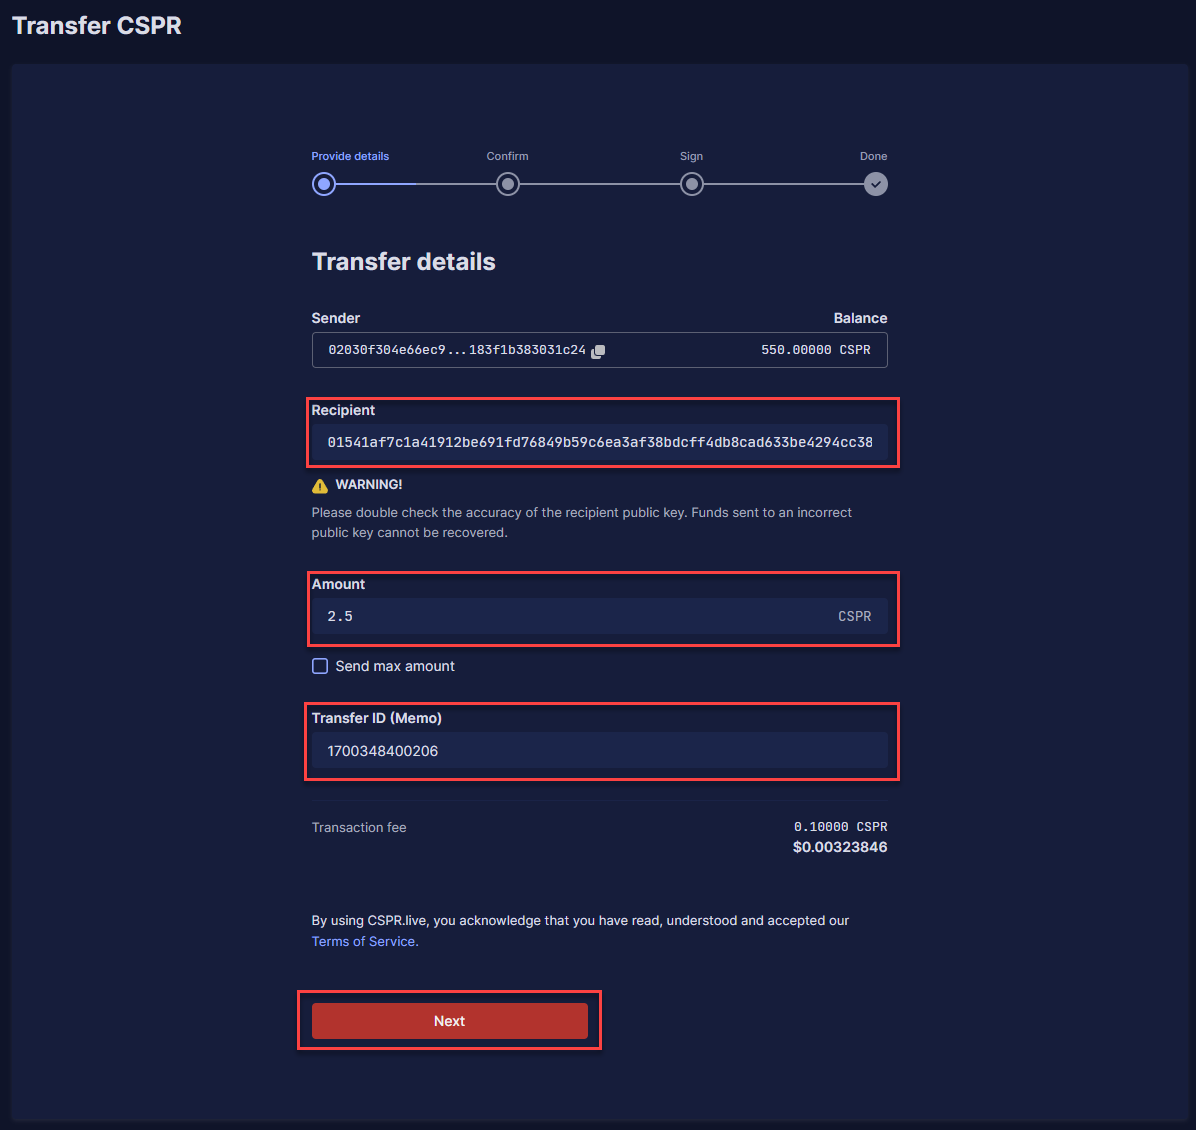
**Stap 2:** Vul de public key in waar je $CSPR naar toe wilt sturen onder '**Recipient**', de hoeveelheid $CSPR onder '**Amount**' en vul een specifieke Transfer ID in als dat nodig is onder '**Transfer ID (Memo)**'. Dit laatste is soms nodig als je $CSPR naar een exchange stuurt. Als dit niet nodig is kun je '**0**' invullen. Klik hierna op '**Next**'.
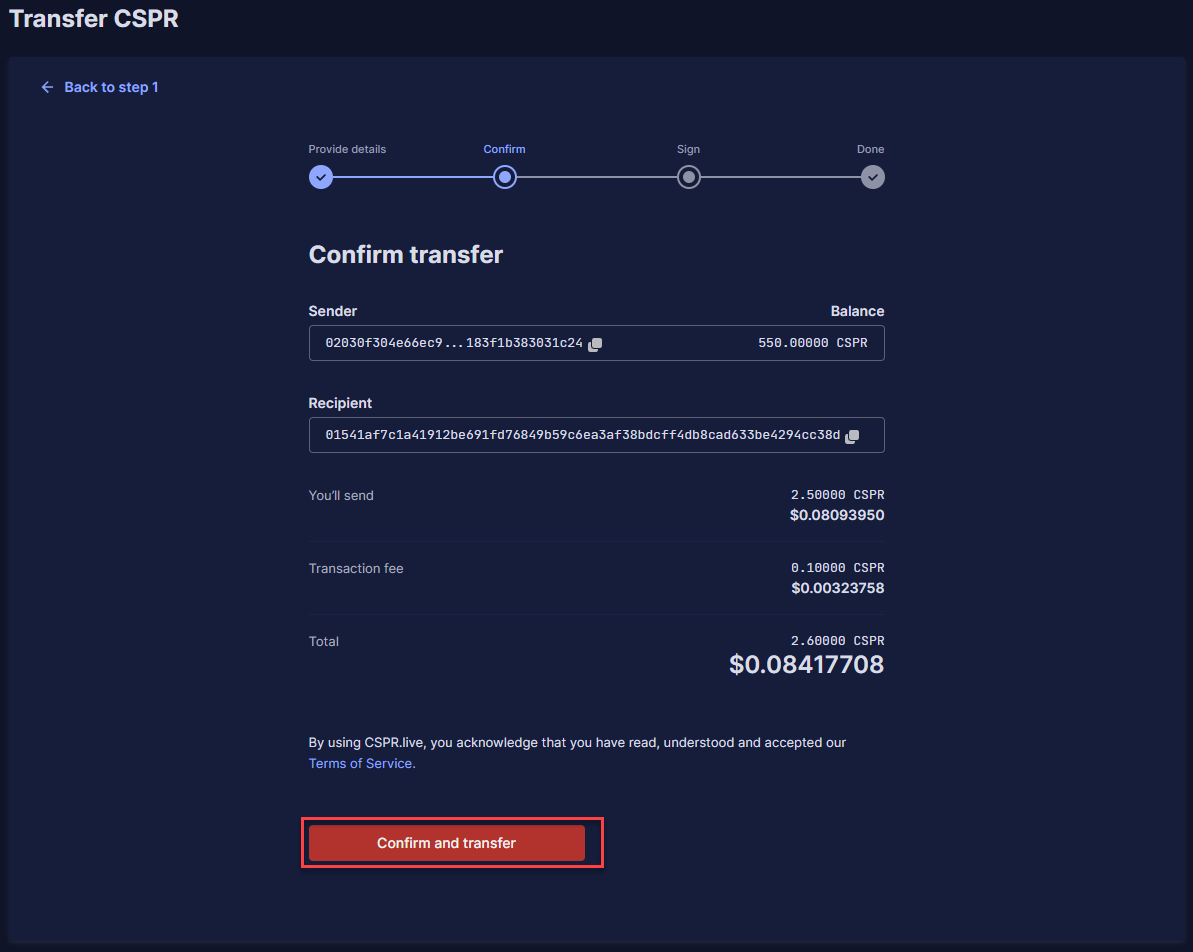
**Stap 3:** Controleer of de informatie juist is en klik op '**Confirm and transfer**'.
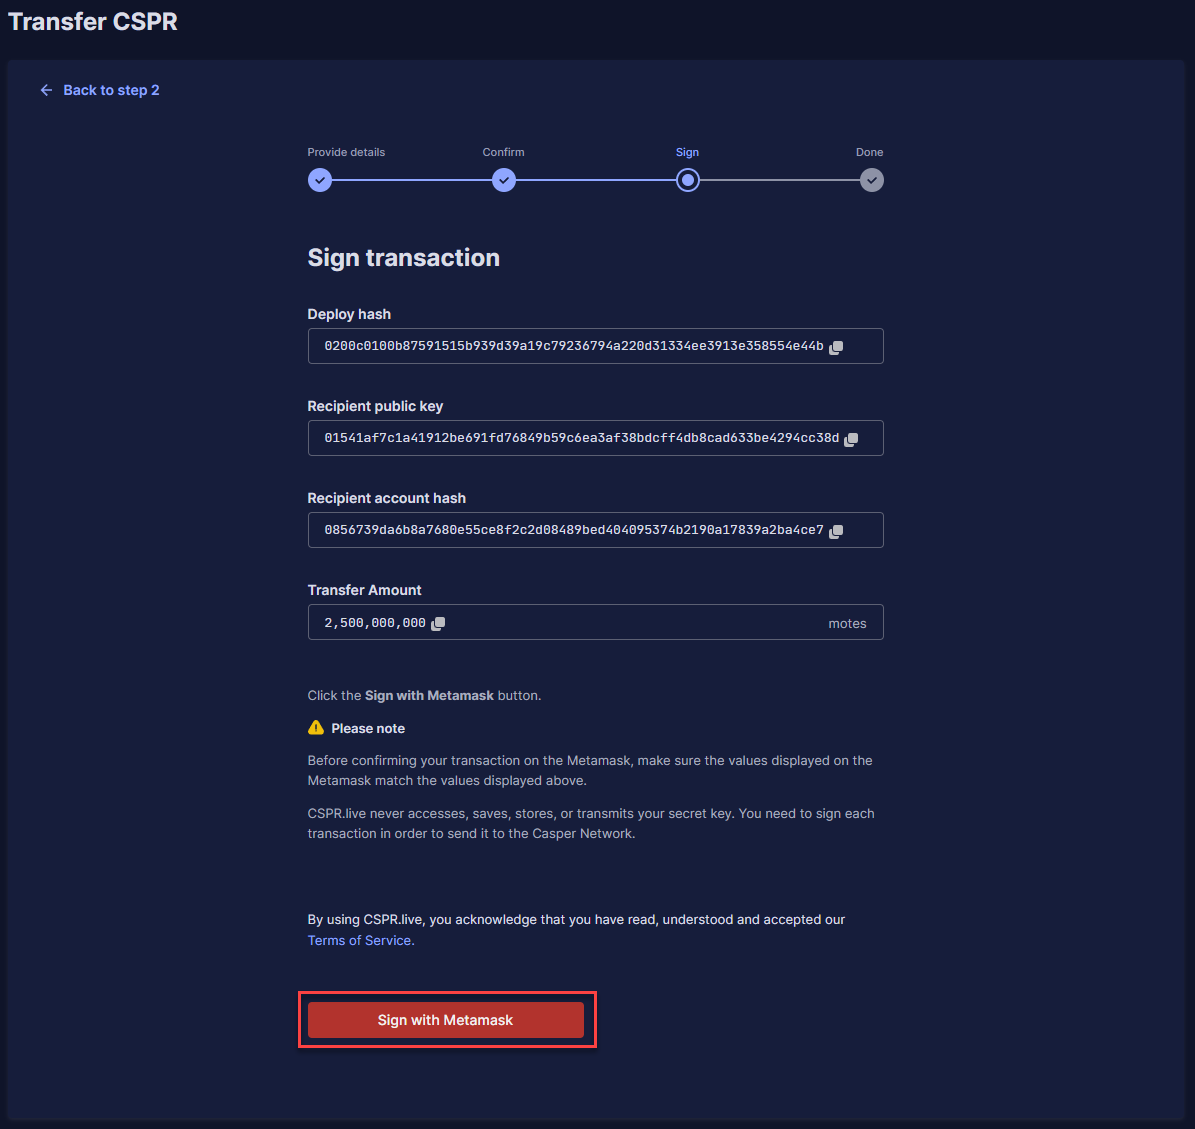
**Stap 4:** Je zult nu alle informatie over je transactie zien en je kunt op '**Sign with Metamask**' klikken.
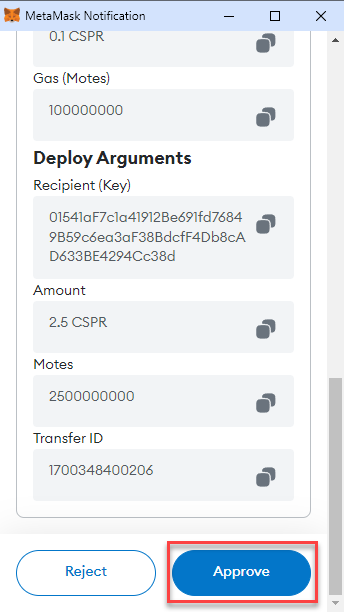
**Stap 5:** Scroll naar beneden en klik op '**Approve**' in de MetaMask extensie popup.
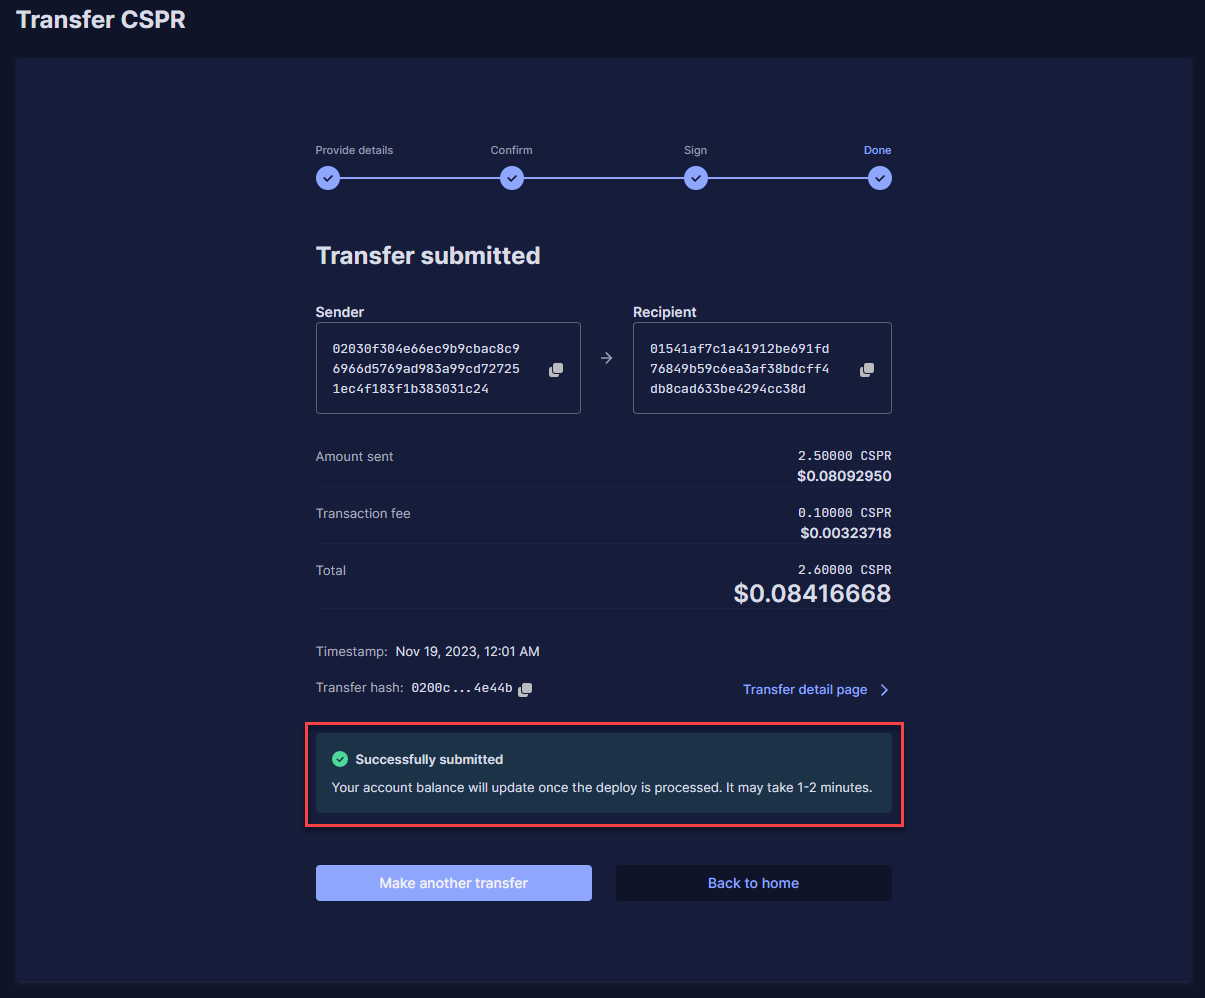
**Stap 6:** Je ziet nu de details van je succesvolle transactie.
## **Hoofdstuk 5 – Stake $CSPR met MetaMask**
**Stap 1:** Beweeg je muis over '**Wallet**' aan de rechterbovenkant van je scherm en klik op '**Delegate Stake**'.
**Stap 2:** Kies een validator onder '**Validator**' (**bijvoorbeeld, Speedy Staking**) en vul de hoeveelheid $CSPR die je wilt staken in onder '**Amount**'. Klik hierna op '**Next**'.
{% hint style="warning" %}
**BELANGRIJK: Stake niet all je $CSPR, je zult in ieder geval 2.5 CSPR nodig hebben om later je tokens te unstaken.**
{% endhint %}
**Stap 3:** Controleer of de informatie juist is en klik op '**Confirm and delegate stake**'.
**Stap 4:** Je zult nu alle informatie over je transactie zien en je kunt op '**Sign with Metamask**' klikken.
**Stap 5:** Scroll naar beneden en klik op '**Approve**' in de MetaMask extensie popup.
**Stap 6:** Je ziet nu de details van je succesvolle stake transactie. Je zult je eerste staking rewards na ongeveer 4 uren ontvangen. Daarna ontvan je elke ERA (\~2 uren) staking rewards.